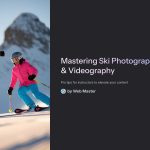
 With the rise of social media and online coaching, ski instructors can greatly benefit from capturing high-quality photos and videos. Whether you’re documenting your own technique, creating tutorial content, or marketing your services, mastering ski photography and videography is a game-changer. In this guide, we’ll explore essential techniques, equipment recommendations, and insider tips to help you shoot stunning images and videos in snowy conditions.

Choosing the Right Camera and Equipment
Shooting in snowy environments presents unique challenges such as brightness, contrast, and temperature effects on equipment. To capture professional-grade ski photos and videos, selecting the right gear is crucial.
- DSLR vs. Action Camera: DSLR cameras offer superior image quality, but action cameras like GoPro and Insta360 provide durability and ease of use.
- Lens Selection: A wide-angle lens is ideal for capturing expansive landscapes and action shots, while a telephoto lens helps zoom in on skiers from a distance.
- Stabilization Gear: Use a gimbal or a chest mount for smooth video shots while skiing. Tripods with flexible legs are great for setting up in uneven terrain.
- Weatherproofing: Ensure your camera is water-resistant or use protective housing to prevent lens fogging and moisture damage.

Camera Settings for Perfect Snow Shots
The brightness of snow can trick your camera’s auto-exposure settings, leading to underexposed shots. Adjust these settings for optimal results:
- Exposure Compensation: Increase by +1 or +2 to avoid underexposure caused by bright snow.
- White Balance: Set to “Cloudy” or “Shade” to prevent blue-tinted images.
- Shutter Speed: Use a fast shutter speed (1/1000s or higher) to freeze action in motion.
- Frame Rate for Video: 60fps or 120fps is ideal for smooth action shots and slow-motion effects.
- ISO Settings: Keep ISO low (100-200) in bright conditions to avoid overexposure.

Best Angles and Framing Techniques
Capturing dynamic skiing shots requires a strategic approach to angles and framing. Consider these techniques:
- Low Angles: Shooting from a lower position enhances the sense of height and speed.
- Leading Lines: Use ski tracks and mountain slopes to guide the viewer’s eye towards the subject.
- Rule of Thirds: Position the skier slightly off-center for a balanced composition.
- Action Sequences: Burst mode is great for capturing a series of movements in one take.

Capturing Motion: Slow Motion vs. Time-lapse
To showcase skiing techniques effectively, choosing the right motion effect can make a huge difference.
- Slow Motion: Best for analyzing ski movements in detail. Use 120fps or 240fps for smooth slow-mo effects.
- Time-lapse: Ideal for scenic shots, ski lift rides, or showing changing weather conditions.
- Tracking Shots: Use a drone or follow-cam technique to capture dynamic motion from behind or beside the skier.

Editing and Enhancing Your Shots
Post-production is where your raw footage transforms into a professional masterpiece. Key steps include:
- Color Correction: Adjust contrast and saturation to enhance snow details.
- Stabilization: Use software like Adobe Premiere Pro or Final Cut Pro to smooth out shaky footage.
- Trimming & Cutting: Keep only the most dynamic parts of the footage for engaging storytelling.
- Adding Text & Effects: Overlay tutorial notes or slow-motion annotations for educational content.

Promoting Your Ski Content Online
Once you’ve captured and edited your content, it’s time to share it effectively.
- Social Media Platforms: Instagram Reels, TikTok, and YouTube Shorts work best for short clips.
- SEO Optimization: Use relevant keywords and hashtags to increase discoverability.
- Enski photography tipsgagement Strategies: Encourage followers to comment and share by asking questions in captions.
- Online Portfolio: Create a website or blog showcasing your best ski photos and videos.
*Capturing unauthorized images is prohibited*


